


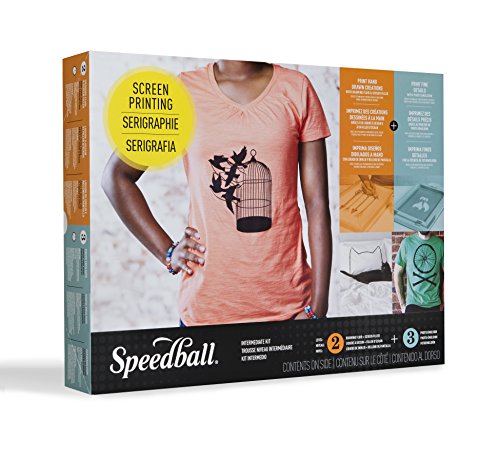
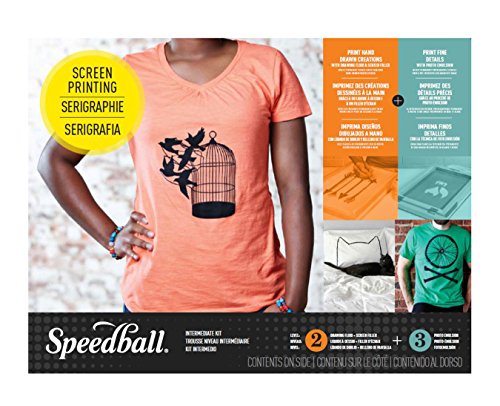
- Whether you are a beginning crafter or printmaking pro, this kit makes it easy and fun to create a wide variety of unique projects for home or business!
- This kit contents are ideal for projects ranging from customized clothing to home décor and everything in between!
- Make t-shirts, curtains, pillowcases, stationary, and much more with these high quality products and easy-to-follow instructions!
- Kit includes: (2) 4oz Fabric Screen Printing Inks (Black and Red); (1) each 4oz Screen Filler, Drawing Fluid, DIAZON Photo Emulsion Remover, Speed Clean; (1) 3.3oz DIAZO Photo Emulsion; 1.07g DIAZON Sensitizer; Red Baron Squeegee; 10 X 14"" Printing Screen; round brush; and craft sticks
-
Information
-
Twitter
-
Pinterest
-
Youtube
-
Facebook
Rachel McGlenister
Very easy process, great beginners kit!
I used this kit as a first time screen print hobbyist and it worked great! I made more than 35 shirts for a family reu uo and everyone was very pleased with the quality!
Dana Faust
Worked good for me
I'd done screen printing using a stencil but wanted to try the photo emulsion. I watched the speedball video on Youtube and followed the instructions using the Eiko 250W photo bulbs I bought on amazon and a 300W reflector lamp with ceramic socket from home depot. Everything worked, the emulsion washed out easily in a few minutes and it printed out great. The emulsion remover worked good, too, using a cheap foam brush so the screen is ready to go again. I used TruOffice Transparency Film for Laser Printers, Quantity 50 (TF-LP) with a samsung printer for the image.
Patricia Best
Great kit!
Wonderful kit for the price! I made some shirts for my friends and onesies graphics for my friend having a baby. Comes with an instruction manual. ..carefully read through this before you start. There are a Lot of steps!
Fozia Amjad
I found it to be a good starting kit, but still needed one thing
had everything I needed to get started BUT needed some thing to hold the shirt during the screening and it's removal. I ended up just building one out of 3/4" plywood (that was laying around), similar to the mechanical frame holders that you can find on amazon.
Maigen Pierce
Love it!
Works great! I have screen printed twice so far and both times worked great. Recommend this highly for new printers seeking something for small products. I made the shirts in this photo from the kit.
Lisa Tomlinson
Tons of Shirts Made, Still Holds Up
Absolutely wonderful. Great price for three colors, and instructions of different ways to print shirts. Make sure you follow the directions exactly, or the prints could turn out wonky. Also, Walmart has $2-3 shirts! Good luck creating!
Leslie Roland
Everything was perfect in package.
It is great if you can make it past the initial I am going to screw this up hump. Just make sure to watch some videos and follow the instructions and you will nail it.
Youcef Aid
Great starter kit!
For the price, this is a great screen printing kit for beginners. My kit arrived Sunday, two days ahead of schedule... I was amazed! I am lucky that everything arrived safe and sound; no open jars. I delved head in, and used the photo emulsion for my project. I am posting some photos of my silkscreen project, so don't forget to take a peek. This is what I did: 1. Went out shopping for a bug light, t-shirt (washed - no softener), pane of glass and had my art printed at FedEx Office. 2. Cleaned the silkscreen with Dawn and dried with a hair dryer. 3. Coated the silkscreen with the Diazo photo emulsion and let dry (4 hours+). Done in a dark room only lit with a bug light. 4. Taped my artwork to the bottom of the silkscreen and held it flat with the glass pane. Kept in box, away from light. 5. Took the box outside at noon and exposed for 2 minutes 50 seconds. Closed box and ran to the sink. 6. Lightly sprayed both sides of the silkscreen with water and waited two minutes. Then sprayed water at full blast to remove emulsion. Patted dry and took outside to post harden for 5 minutes. 7. Did the Balki Bartokomous happy dance. 8. Used painters tape to close gaps around emulsion on silkscreen. 9. Printed t-shirt and quickly cleaned tools and silkscreen. 10. I heat set the ink with an iron. Five minutes on front and 5 on back. 11. I washed the t-shirt again to test for proper heat set. It passed! 12. Wore the t-shirt and fooled my friends into thinking I had bought it. :-D
Leoj Flores Vidal
Worth it!
I absolutely love it! I did lots of research and looked up YouTube videos so I can get a technique. I used my Cricut explorer to print out the vinyl decal, mirrored the image, placed it underneath the mesh screen and taped off the extra mesh to stop any leakage of ink from reaching the fabric. Took a while to get the technique down so I suggest using old shirts/fabric to do a few test runs. It’s so Worth it. I can’t wait to do some more shirts in different colors and styles. I will definitely recommend this product and buy again.
Sulaimon Shukroh Modupehorlaa
Great product
I made this purchase when my husband's band decided we [I] should make shirts. (Lol) I had always wanted to try screen printing and I do love it. Very detailed information included, so easy my 8 year old helped me.