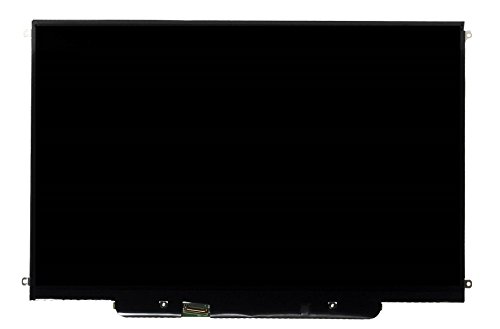
- Screen Size: 13.3"
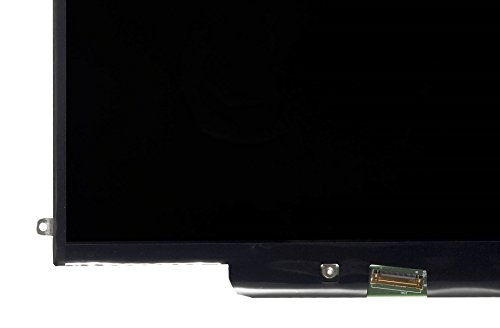
- Connector: 30 Pins
- Screen Finish: Glossy
- Maximum Resolution: 1280*800
- Guaranteed Compatibility
-
Information
-
Twitter
-
Pinterest
-
Youtube
-
Facebook


Tracy Carrier
I like the screen its like the original from apple
My son accidentally broke the screen and I almost buy a new mac. I decided to search youtube first and seen generous people shared how they fix the screen. I followed a link shared by one of the you tubers "KeoFleX LLC" to be exact and take me to this seller. I like the screen its like the original from apple. Easy to install and good they place note in the packaging that the screen has a thin protective filter on it or otherwise you can't really noticed it's there. Just don't forget to calibrate your new installed LCD screen and if you have doubt installing, just go ahead and watch it on youtube. Hope this help, :)
Carey Jordan
Perfect replacement
I own a mid 2010 Macbook(7,1) and this is, indeed, the exact replacement needed for my model. If anything, they are actually better than OEM LCDs shipped with Macbooks. I have purchased two of these now, the first was to replace the original when, after a year and a half, it started freezing and fading to gray; a very common, infamous issue with several models of Macbook LCDs. I was skeptical at first that it was as good as the original, but once installed my fears were put to rest. That one worked perfectly for over a year until an ungrateful, accident-prone and overweight guest stepped on it after having set it on the floor while he got out of a recliner, a full 250lbs of dead weight applied to the upper right corner of the LCD which caused the layers of the display to split along the seam and allow liquid crystal to leak. Even then, the display functioned very well, far exceeding what I would have thought. I continued to use the display another three-weeks as an ever-changing black blob of liquid crystal grew and shrunk and migrated around the otherwise perfectly performing display. Not only did the display continue to function, it also contained the liquid inside the panel until being replaced... not a single drop escaped! This second replacement, like the first, appears to be as good or better than the original LCD, and I have no doubts it will perform as well as the first. *** For those attempting this replacement on a 2010 Macbook (possibly other models) for the first time... aligning and connecting the LCD cable can be a frustrating challenge unless you happen to be equipped with several sets of tiny arms! I spent over an hour attempting to connect the cable the first time I replaced my display and when I did manage to do so it was by sheer luck. The second time started out just as frustrating until by accident I discovered if you lay your macbook down with the LCD case on the table and the keyboard in the air as if it were the display, gravity assists in positioning and guiding the new LCD into place and onto the cable... no frustration!
Majid Khichi
Beware of the RED C. - Problem solved
Received the screen as advertised, in reasonable time. Installed the screen with no difficulties and it does work nicely, but: I did get one with the red 'inverted C' in the lower left quadrant of the screen. I've not studied it closely yet but I believe this to be in the pixels and not some type of ink ON the screen. Others have said they have tried 'removing' it with no success. The formation does not look at all random to me. Not a perfect C, but very distinctive. Located approx 2" in up from the bottom and 2" from the left side; sort of a 'high use' area. It is approx 5/16" in size. Anyway, the screen is still very usable. The C is very noticeable / obvious whenever the screen background is white. It can become very faint with darker backgrounds. Would I prefer it not be there? Of course. But since my previous screen was nearly dead, I'm keeping it for now. Maybe buy another replacement down the road, but I'm functional again. Update 11/14; This was totally my fault. The 'Red C' is printed on the protective film that is otherwise VERY hard to detect. I removed a very obvious film cover that was tapped to the front of the screen and figured that was it. After I noticed the 'problem', I contacted tech support and received a prompt e-mail that yes indeed, I had failed to remove another protective film. I removed the front glass and looked very carefully and located the remaining film. Pulled it off and the 'C' was right there on the film. I now suspect that they intentionally print this on the film for the benefit of people like me! Very satisfied with the product now.
Brenda Joiner
Use iFixit for install instructions
Great, solid replacement. No dead pixels to the naked eye and the resolution is identical to the factory part. My advice would be to buy a screen glass replacement, as the glass will most likely break upon installation. That is the most difficult step. Use iFixit.com and follow the step-by-step install guide.
Simone Gallimore
Worked on Apple MacBook model: MC516xx/A
I would recommend this product! I purchased this to replace the screen in my friend's MacBook, model MC516xx/A. The product description made it easy to confirm this was the correct screen. I purchased the tools referenced in other posts and watched the videos posted from others and I was able to remove the old screen fairly easily - MAKE SURE YOU REMOVE THE TAPE ON THE VIDEO CABLE AND PROPERLY DISCONNECT IT OR YOU MAY BREAK THE CABLE/CONNECTION AND HAVE TO REPLACE IT TOO! The install of the new screen was fairly clean. The only tricky part was re-connecting the video cable, which took a lot of patience and about a half-hour for me to finally connect (I have big fingers, which doesn't help). Other than that, it was smooth sailing. I fired up the machine before reattaching the bezel (highly recommended) and was very happy with the screen's brightness/clarity and the camera/wi-fi were verified too! It looks like it came right out of the Apple store! I used 2mm double sided tape to reattach the bezel, which worked like a charm. My friend went to the Apple store and they were going to charge her $450.00 to replace her screen. With the tools and videos posted by others and a little patience - you can do it for $46.00! Good luck with replacing your screen!
Poe Zarni Kyaw
Looks Great!
Two pieces of advice up front: 1) Ensure you have a full can of air at the ready. You'll need it to blow off the inside of the screen and LCD really well. My can ran out, and it would have given me a much higher confidence level had I been able to thoroughly blow it out. First time I put the screen on I found a hair in the center. Removed it again and cleaned it out. So blow it out thoroughly with a can of air. 2) Be prepared for the old screen to crack. There are probably some laptops, like ours, that the old glass screen is just too stuck on to remove without breaking. My old screen cracked while removing it to replace the LCD. After dealing with it (tiny extremly-sharp shards of glass launching all over the place), I found there was no amount of heat that was going to allow me to remove the glass without it cracking. The adhesive in a couple places came up super easy, and in other places, not without scraping with a putty knife. What a mess. Took me an extra hour to deal with it, and ensure the remaining shell had no remaining shards of glass. The LCD looks really great, no complaints about it, no dead pixels. Overall I spent about $100 on parts and tools, and about 3 hours. I've never done this before so I used some step-by-step tutorials on ifixit. I had already planned on replacing the glass (I wasn't sure what was cracked), so I bought this one, and it worked great: http://www.amazon.com/gp/product/B0096AT61O/ref=oh_aui_detailpage_o01_s00?ie=UTF8&psc=1.
Imane Ait El
Works perfect! Im shocked
I am amazed that I could fix this problem by myself! It took a heat gun, a few suction cups and a credit card. Slowly heat the edge of the screen without melting the rubber gasket. Once you got it good and warm use a suction cup to release the glue seal from one corner. Then you use the credit card to make your way around. Using the suction cup again only if necessary. Then you do a few tricks to unhook the wire, I learned it on youtube and BOOM! NEW SCREEN! Then you just install the glass again and reheat the glue along the edge to get a good seal again. Just make sue to clean the dust off the screen and glass so you don't have dust inside!!! PS the resolution is just as good as the original :)
Nigel Gorbunow
Not as hard as I thought
Computer shop wanted 3 days and $200 to replace my cracked screen. After watching a few YouTube videos I decided to give it a go. A few basic tool, a hair dryer and some patience and two hours later my screen looked brand new again. Very pleased.
SecretoMoney Na Power
Perfect Replacement Screen
I bought this, obviously, to replace a failing display in a MacBook. The screen itself was perfect and is functioning beautifully. There is a clear screen protector on there that needs to be removed before bolting everything back up. If you turn it on and see a red marking on the screen, then it's probably still on there. This isn't a repair for the faint of heart. Technically, the approved replacement part is the entire screen assembly, ie there's not a straightforward way to remove only the display. Long story short, you will also need a heat gun, some spudgers, and various precision drivers. I also found it extremely helpful to have a magnifier on for the disassembly process (the screws are all very small). You may also need some high strength clear double sided tape to put the glass back on if it doesn't want to stick back on there. (This product does not include the glass, if you need to also replace the glass) If you have a repair background and/or you're feeling bold, this product (and whatever other tools you buy) are much lower in price than taking it in to the repair shop (assuming everything goes well).
Ryan Lee
Perfect:I have a brand new apple macbook screen!
This is the perfect solution for those of us who think Apple rips off people by charging 200 for a new screen. This worked and is fairly easy to do yourself~ I am glad that I did my homework and decided to follow the least intrusive way of replacing the screen. There is no need to remove the base from the LCD housing, nor is there a reason to remove the fan and the battery, like some videos tell you. All you need is the Apple repair tool set, that is sold from a link on the "People who buy this also buy" suggestion under the page that you can find the macbook display LCD screen for sale on Amazon-it's less than 10 bucks and is a wise investment as it can be used to repair all of your apple products including your iPhone. And you will need a hairdryer, or heat gun with a low setting. The easiest to follow videos on YouTube were by jarcomtech,"How to remove a MacBook Screen-LCD A1342,""How to replace a MacBook Screen A 1342, and from another user, "MacBook A 1342, replacing the fiddly bit", byDrumnakill. I recommend watching them all one or two times and then following along. The Fiddly bits the connector that is hard for some to reconnect when replacing the LCD screen, and it is also tricky to disconnect it but it's the connection that will enable the Screen to work, so it's important to know what you're doing. This video is very short and focuses close up on this process exclusively, which I found VERY helpful. Good luck~ I can't believe I did it and didn't screw anything up. If, I, the most clumsy and accident prone when it comes to tech things(hence the broken LCD screen to begin with:) _) can fix it, anyone can do it. If you don't have money to burn to pay someone to do it, buy this screen and feel like a tech genius yourself~ Good Luck