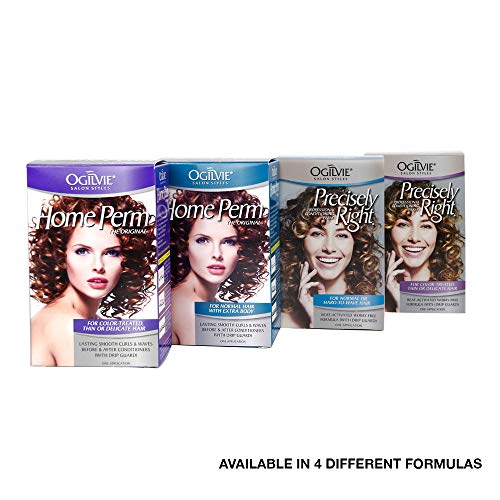
- For Color Treated, Thin or Delicate Hair
- One Time Use/Application
- Before & After Conditioners with Drip Guard
- Professional Conditioning Perm
- Long Lasting Smooth Curls & Waves
-
Information
-
Twitter
-
Pinterest
-
Youtube
-
Facebook


Asifa Syeda
Happy I Purchased This Perm
The only home perm I had ever used was Lilt which is no longer available, so I tried Ogilvie. It is a fantastic home perm! My hair looks as good as any salon perm. I left the curling lotion in for 5 minutes but next time I think 2 minutes will be enough. Very happy with the results. I have been paying 100.00 for a perm but no longer. My husband said this perm looks like a professional one. The reviews were accurate. I was happy to see the end papers are the larger size. I would recommend to others.
Robbie Martinazzi
It works GREAT as a STRAIGHTNER if you don't use curlers!!!
Ok, for those of you who need a STRAIGHTNER you can use this as an alternative!!!! Just don't use any curlers! It works great!
Crystal Black
Five Stars
always use this & I bleach my hair too, but the perm does not hurt my hair.
Val Dodge
Reliable Home Perm
I've been using Ogilvie Home Perms for decades, but they're getting harder to find in stores. They work really well and the perm lasts for months. The pre-conditioner makes all the difference. I set my hair on plastic rollers because perm rods can make your hair poodle-y; Ogilvie perms have never fried the ends of my hair.
Desirae Beck
Salon quality results at a fraction of the price
Making small talk with hair stylists occasionally makes me uncomfortable, so I’ve been meaning to try perming my own hair for a while. My hair is naturally a loose wave, but as it grows longer than shoulder length, gravity takes over and it appears straighter and straighter. I decided to perm my hair to ameliorate this and give my hair more volume. I cleared 3-4 hours one afternoon for this, and the perm solution worked well. **Do NOT try perming your hair without reading the printed instructions and doing research online.** SUPPLIES: - perm solution - perm rods - hair shears INSTRUCTIONS: 1. Wash hair with clarifying shampoo 2. Brush hair and cut/trim hair ends so that hair is even before perm. The nice thing about cutting your own wavy hair is that uneveness blends in better than straight hair 3. Wet hair and use pre-perm solution 4. Section hair with comb, wrap ends with end papers, roll onto perm rods & secure. Repeat until all your hair is secured with perm rods. This is the longest part! Note: the end papers are important because otherwise your hair will slip through the rods 5. Wrap cotton coil around temple and head - Vaseline helps the cotton adhere to the temples 6. Apply perm solution to each rod. I used the whole bottle to be safe. 7. Unwind a rod and check for an S shaped curl after the time noted in the table 8. Rinse hair and rods in the shower for 5 minutes 9. Dry each rod with a towel. Since you're at home, you should be able to air dry as well. 10. Apply neutralizer solution to each rod. 11. After 5 minutes, unwind the rods. I placed the used rods in the sink so I could wash them. Brush your hair with your fingers. 12 Rinse neutralizer out of your hair in the shower. 13. Apply post perm conditioner 14. Don't wash hair with shampoo for 48hours. This perm doesn't smell as strongly as others. After the 48 hour mark, you can wash, comb, and trim any ends that were fried
Gun Hamberg
Perfect results
Worked out great. Got lots of compliments. Will do it again in about 6 months.
Katie-Lynn Arter
I have very fine hair and this works incredibly well with my hair
I have very fine hair and this works incredibly well with my hair...thanks! the perm looks very soft and feminine...it will be easy growing my hair out from a blunt cut, just below chin length cut now that it's in spiral curls...before it was flat and ugly!!! All I have to do is run my hands through the curl, put a leave in conditioner on it and out the door I go!
Shehroz Khan
Using as a Straightener
I use the product to straighten my hair.. it is more gentle than an actually straightener... A beautician once told me to straighten your hair, use a permanent and reverse it... instead of rolling up on rollers, you put the perm solution on and while timing it, comb it to keep it straight... works very well
Ryan Jay
On time
Ogilvie has always made the best home perms! Arrived well packaged and on time. thanks
Linda Patero
Five Stars
I used this yesterday and was very pleased with my curls and hair condition.