- Consumer, Commercial Turf Equipment, Golf Cars & Utility Vehicles
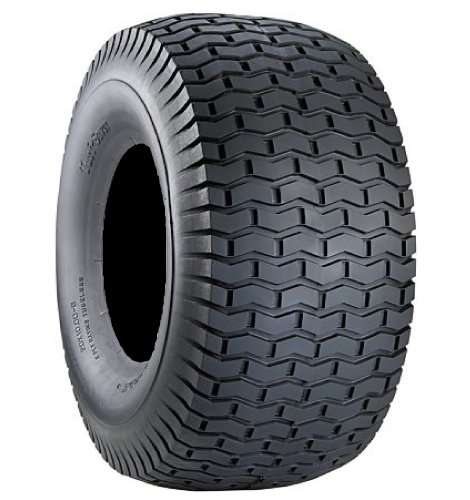
- Tire Only - Wheel Not Included
-
Information
-
Twitter
-
Pinterest
-
Youtube
-
Facebook
Connie Pereira
They work fine, not a breeze to mount.
Yes, like many my tires arrived compressed, I read the reviews here and follow several of the recommendations. I first bought one rear tire for my ten year old lawn tractor, A week later I had to buy another one for the front and two weeks later one more rear tire so I ended buying all four. I try the hot water tub, but it didn't work form so I left them on the summer sun here in north Georgia, for a couple of days and that work in each and every one to regain its shape. Installation was not a breeze for me but I did replaced them all with my wife's help. I did buy the Core Tools CT116 Tire Iron Set I would not recommend them they are to small for the task... so I ordered the Ken-Tool yanzhen Tool Tire Iron Set, Small and it was much easier to work with them. I used the ratchet straps technic which worked well on two of them... and the fuel technic on the other two, (you can look for them on Youtube). Yes, they are made in China... So far they work fine uphill and downhill.
Jana Šavlíková
Exact Ariens Match for me. TAKE TO TIRE PLACE TO PUT ON RIMS
Ariens Lawntractor from Home Depot purchased in 2014, and was happily surprised that they are the exact OEM match that was on the ariens. Didnt really pay attention when ordering. What I received is the Carlisle Turf Saver. (I make no guarantees that you get the same) BIG ADVICE! Dont waste your time trying to remove the old tires from rims and putting new ones on. Its ridiculously more harder than you think. After trying a bit I took the tire/rims to a local independent tire place and for $15 each (plus tip) they swapped out the tires AND put a new valve stem in. I got lucky with timing and was there and back in 30 mins. Seriously it would take you hours to do the same.
Claudia Kaya Leal
Good price and quality
Mine were shipped without a box, strapped together, but they arrived safely and quickly. They were a little flattened but not as much as I expected from the other reviews. Taking the old tires off and reinstalling certainly will try your patience if you choose to do it with typical household garage tools. I used a couple large flat bladed screwdrivers and a flat pry bar. Took about an hour to do the two tires for the front of my riding mower and a fair amount of colorful language. Of course you can go into a tire shop (our small town has a great one) and they can probably do each tire in about 90 seconds, but cheapness and stubbornness prevailed on my part. One of the difficulties in removing the old tires was breaking the bead seal along the rim loose. On one tire I resorted to putting the tire and rim, flattened of air, into a large vise and squeezing the two rubber sides together (not the steel rim) and that worked like a charm. For other tires I've needed to use the ratchet-strap-squeezed-around-the-outside trick to help seat the bead when inflating, but neither of these new tires required that, they both sealed fairly quickly. The tread and overall quality seem to be about like the original tires I was replacing.
Ethan Belgard
Perfect match for the same exact tire
Perfect match for the same exact tire, what do you know... My lawn tractor will actually steer now and not just go in the direction the rear wheels are pointing. Experience installing (self) was as expected - use some grease and clamps and jump on them to "break the bead" off of the old rim - old tires had been on the rims for 12 years and were very stuck. To re-air the new tires I used a ratchet strap around the perimeter, cranked it down which manages to spread the bead out to the rim. They haven't lost any air in the year since I put them on the rims despite regularly driving them over large blackberry vines. I'd say 4.5* with a reduction for price as you can buy car tires for less.
Cory D Young
Great tires for money. Some installation tips included.
Bought for replacement on my tractor. Using a tire lever and screw driver, was easily able to get the old ones off. One trick I found to push the tire off the rim was to squash the old tire in a B&D Workmate. This pushed the tire off the rim, so it could easily be levered off the rim fully. New ones went on easily. Use a little neat washing up liquid or other lubricant to help lever the tire on. Finally, to inflate, yes you can tire rope around the circumference and get them to seal so they can be hand pumped, but easiest thing is to take them to gas station, and inflate with an air hose, done in seconds with less frustration. Also saw other posts about leaving the tires in a hot place before installing. Makes sense and good advice for the winter installs.
Krystal Brewster
Like many, my tires arrived compressed
Like many, my tires arrived compressed. I have seen several complaints with regard to this. Having worked as a mechanic I am here to tell you that while automotive tires are not compressed this way for shipping, most large lawn tractor tires are. This is not the shipping people, this is the manufacturer who does this. The trick is to remove the shipping straps/materials and place the tires in a warm place to "decompress." They will eventually "pop" into their original shape as manufactured. If you try to mount them too soon, and you put them at the proscribed pressure, you'll end up with your tire rolling off the rim repeatedly. In fact I've seen cases where people did this and the tires ended up with a permanent saddle shape. If you don't have a nice warm sunny climate or a good heated spot (like right below a heat duct) in a shop, you can use a heat gun on low to warm them. I have done this in winter time when replacing tires on winter equipped snow rig tractors. Just warm them gradually. In one case I ended up heating and reheating the tires on and off over the course of a couple of days until they finally took shape. The tires themselves perform well. They arrived in excellent shape. Other than a little "flash" rubber at the bead of one (which was easily trimmed to make a better seal) I have no complaints with the quality. EDIT: I did forget to mention one problem with the tires. Actually only with one tire. In spite of them being, as you can see from my included photographs, Carlisle Turf-Savers, Made in U.S.A. and 4 ply, one tire had a nasty defect. The side wall height is imperfect, in fact off by about a centimeter. This caused the tire to be very difficult to mount to some degree, and causes it to lose air due to imperfect bead seating on the rim. I solved the problem by installing an inner-tube. The problem with "Made in U.S.A." these days is that US standards are nowhere near like they used to be. Once upon a time American laborers did a great job because they took pride in their work. Now most of our labor force is made up of entitled folks who'd rather take a day off whenever possible.
Dona Brown Moyers
QUALITY Tire from AMERICAN Company you can TRUST
There are fewer and fewer recognizable names in tires. CARLISLE is an AMERICAN company still making items in the USA and well worth the few dollars they may be more than some Asian garbage you've never heard of. I have 20 years experience selling tires from Off Road Monsters to wheelbarrows and though retired from the industry I still buy CARLISLE for my own equipment. These tires can be installed at home with no fancy special tools, but a vice and an extra set of hands make it easier. Some pry bars and soapy water plus muscle is all it takes. Don't waste your time with some junk from a company you dont know. Its not worth the hassle on these. I also recommend adding tire slime for the eventual rim leak or puncture. These tires will last, especially if you keep them inflated in the off season to avoid flats from slow leaks.
Ajit Ojha
Identical to Original Rear Tire on John Deere LA145
Not much to say except they are identical tires to what I have on my ten year old JD LA145. I self-installed using one of those cheap Chinese mini-tire changers. I bent the threaded rod on my tire changer while breaking the bead, so be careful if you go that route. If I had to do this over, I'd buy the rear tires here on Amazon and pay a tire store to do the work. For me it wasn't worth the effort. The smaller front wheels are a different story. Those are very doable with a small tire changer or tire irons if you are interested in struggling with those.
Daniela Garcia
Just what I needed for a replacement
I bought the Carlisle tire because it was a cheaper option on AMZN to replace a tire I punctured on my riding mower recently. The tire arrived quickly, wasn't smashed/compressed like some tires tend to be shipped; it was simply a tire with the shipping label attached. Install was fairly simple: lather a little bit of soapy water around the lip of the tire to help it slide onto the rim easier, then used a couple of blunt flat-blade screwdrivers to pry the remaining sidewall onto the rim. Airing up the tire wasn't too much trouble. I just wiggled the tire a little bit to get the bead set. These hold pretty low pressure, so just realize it won't take much air to inflate to proper level. I think my mower is sitting a little low on the side with the new tire, so I'll put a level on the blade housing to insure my tire gets inflated to a true level height and not just go off what the owner's manual says for tire pressure. One thing to note: the delivery required a signature, which wasn't disclosed when I completed my order.
Choze Young
Put new tires in really hot water to soften to make installation easy. Now remove tires/wheels from tractor
You need a couple of tools to install this tire. Since it is so small it's a little different than a car tire. I am an amputee ( Leg above the knee) and I am in a wheelchair so if I can do it anyone can if you apply your mechanical knowledge. You will need a couple long handled regular screwdriver ( About 12" long, blade type) . Put new tires in really hot water to soften to make installation easy. Now remove tires/wheels from tractor. Remove inside of Valve stem ( Where you put the air in) and let all the air out.If stem isn't good, reuse it, if not replace it. I stick one screw driver in under the lip of the rim and grab the edge of the tire and pop it up then insert other screwdriver and work it to the other side. Use a little bit of soapy water, it helps. keep working the tire off on one side then keep it on the same side and do the same thing with the other edge of the tire repeating the same thing on the other tire. Now you take one of the new tires out of the hot water and put a little soapy water around it's bead ( inner edge of tire where it meets the rim). Use screwdrivers to get some of the bead on the rim. Then take a pair of Vise grips and attach one to the edge of the rim where you have stopped with your screwdrivers to hold the tire in place. Now work your screwdrivers in and start working the bead of the rest of the tire on and use a little bit more soapy water if needed. Once that bead is installed, keep wheel and tire as is and work on the other bead installing the same as previous bead. Install new inner valve at the valve stem and using a small ratcheting strap, tighten around circumference of tire. Now put air to tire valve stem and be sure that tire bead seats on both sides all the way around. Do not overfill with the ratcheting strap still on tire. Remove strap and fill tire to appropriate PSI. Mount and do next tire. Not a bad job just takes some time and saves you some BUCK$!!!!