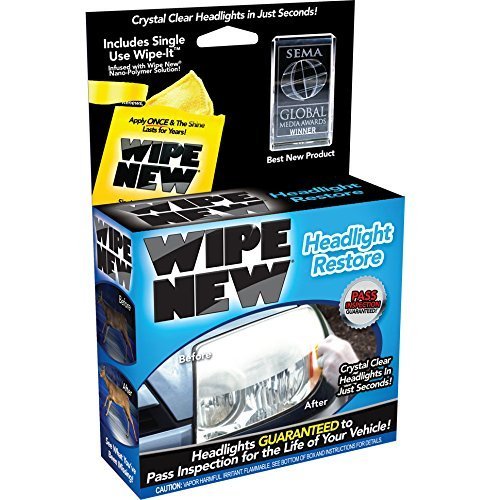
- Headlights guaranteed to pass inspection for the lifetime of your vehicle
- Easy to apply, lasts through hundreds of car washes
- Apply once and lasts for years while saving time and money
- Clear your lens in just seconds
- Made in the USA
- Headlights guaranteed to pass inspection for the lifetime of your vehicle
- Apply once and lasts for years while saving time and money
- Clear your lens in just seconds
- Made in the USA
-
Information
-
Twitter
-
Pinterest
-
Youtube
-
Facebook
Michelle Southern
Absolutely recommend.
I love this stuff. I've recommended it to everyone. I bought this for my car and my mom wanted me to do hers as well (hers was worse than mine). It's so easy, quick and it really really works. I've included before and after pictures that speak for themselves. I would like to note that I initially did my lights with the fresh wipe and then after I did all the other ones, I went to retouch an area and the cloth was a but drier and it ended up taking the product off since it wasn't completely dry yet. So once you've done the initial application, don't touch it! Also, don't drive it for a while. I made that mistake and I guess dust got stuck to the lights so they're not as shiny anymore. I would recommend doing this in the evening when you're not planning on going out anymore and when it's not sunny out. My mom's however, still looks brand new. Unfortunately I don't have before pictures of her car but I promise they were twice as bad as mine.
David Terrell
As promised, my headlights are looking brand new!
I wish I took pics of before and after. This stuff worked great! My car is 6 years old but looked more like 20 with the cloudy headlights. Like one reviewer said, it's only the headlights not the taillights for a reason--dust and dirt are being sandblasted to a hazy finish. The kit I received came with a double sided fine sandpaper type square, a red cloth (microfiber?), blue gloves and a sealed package containing the harsh chemical smelling wipe. The instructions are simple and clear--wet the surface, use the green side of the square to gently scrub off the milky, yellowish stuff. Follow up with another splash of water and use the grey side to polish. This step will take more time and effort, depending on how bad your headlights are. You may have to repeat if necessary. I probably spent 10 minutes on each one. Once you think you're ready for the last step, take the red cloth and thoroughly dry the surface. I let it sit for a few minutes to make sure everything was dry as a bone. Last step: put on the gloves, open the packet, remove the thick wipe and carefully go over the surface ONE time. I think this is important since you don't want to be swiping back on an area thinking you've missed a spot. Some areas I did that don't look as smooth, but it's not a big deal. Who's going to look that close, really?! All in all, this was a simple procedure that didn't take too much effort and my headlights look brand new. Win win!
Claudio Delgado A Luis
Surprisingly Worked!!!
Surprisingly... this product worked wonders on my 2001 Jeep Grand Cherokee!!! I've brought the car to a few places to try to get the headlights restored and had no success (Places actually told me they wouldn't charge me since the headlights didn't change). I got this product since it was very inexpensive and reviews said it works... but I doubted it... until i started rubbing the green square (sanding down) the lens and saw what happened. As others have said... it's not a "1 rub and 100% better" process. I rubbed, rinsed, reviewed, repeated about 3 times per headlight and then polished twice per headlight. Once I rubbed the final wipe on the headlights, they looked as good as new! There is a very strong (chemical / alcohol) smell coming off the pad, so ensure you are in a well ventilated area... but headlights looked almost new vs. hazy and yellow!
Kayla Regimbald
If you hit a lot at night
My friend told me he used this product and i should give it a try. My car is fifteen years old and still has the original headlights, i had only ever cleaned them with soap. Needless to say, i hit a lot of stuff while driving at night. I couldn't see more than two feet in front of me. But after just one use of wipe new, i am able to see at night and realized i am still a horrible driver. But hell, at least i can see and my headlights look very close to brand new. I would recommend this to anyone with dingy headlights.
Becca Sisson
Simply wow.
Wow this wipe down is amazing. Check out the pics. I have a 2nd car for long distance work 2001 camary. The headlights has seen its days. So here it goes, you have to have a lot of arm strenght as you going to rub and rub and rub the sand cube for atleast 30 mins just one side. The other side its just for the finishing touch. A lot of water and rubbing. Dont worry after rubbing and wiping it down with cloth you will see headlight even more foggier. Look at the 2nd photo. I got worried wondering it made it worse. Anyways, i knew that i still had the product to use for wipe down once i did that and the result was amazing. Check the pics. Amazing product.... word of advise DO NOT SNIFF the packet or the small cloth which comes out of packet. I was just curious and sniffed it and the smell just hit so hard that I started coughing bad so dont do dumb mistake like i did.
Sharon Lotayo
Is it as easy as the video
Does it work? Yes it does. Is it as easy as the video? No. It felt like my arm was gonna fall off from rubbing and rubbing but hell it beats buying new headlights. I wanted to use this product and use it on my Infiniti but thought I'd try it out first on my clunker. I have a spare car. It's a 2003 Mustang with 144,000 miles on it. The headlight's were so bad you couldn't hardly see while driving at night. After using this product I can see a lot better and night and they look 100 percent better. Will see how long they last but for $10.00 I would buy this product once a year if I have to... I reordered again and will be using this on my Infiniti.
Janet Beattie
Its not as easy as the commercial shows
I was very very skeptical of this product, but for $10 I thought I'd give it a try before paying $75 bucks at my local detail shop. Its not as easy as the commercial shows. Took me the better part of an afternoon and a good bit of elbow grease. Essentially it has you wet sand the headlights, which all "headlight restoration" kits make you do. After that you apply their "wipe new" solution which is what you're paying for, and that stuff alone is worth double its price. My attached pictures go from before, during(sanding), and after. I was blown away at how good they came out.
Harsha Mehrotra
I Was Skeptical, But It Works!
I have a 2001 BMW, and it's headlights were just horrible. Super cloudy and in need of some TLC. I was debating about buying new headlights, however I'm the type where if it's not broken, why replace it? Also the cost for new headlights was a bit more than I wanted to spend right now, so I started searching into headlight restoration. I found this product on Amazon, read the reviews, checked out the photos and figured I would give it a shot myself. It is cheap, so I wasn't quite sure what it could do for my cloudy headlights. HOW I USED THIS PRODUCT: I had to wait a few days where I knew I would have at least 2 rain free days, and today I decided to give it a shot. The directions are pretty basic and fool proof. I started by putting water on my headlight, using the green side of the tool for about 3-5 minutes. I kept re-soaking the headlight, it was crazy how much gunk was coming off. Next I rinsed it, and proceeded to use the gray side to polish the headlight. I did this for about 2 minutes. Rinsed again, then used the microfiber cloth to dry the headlight. I then did the same on the other headlight, repeating all processes. Next I put on the gloves, and ripped open the pouch with the restoring cloth. With one swipe I covered my entire headlight. Did the same to the other. Done! When I stepped back I was very surprised at how clear my headlights were. They are not brand new clear obviously, and didn't expect them to be. However when you compare what they look like now, verses what they looked like before, it's like night and day! So far I am super impressed. I am anxious to see how long this will last long term. So far I do recommend this! I have included before and after photos, close up and from a distance to give a better view of this product in action!
Angela Paterson Dell' Arte
pretty good product
Its been awhile since i got this product and was able to try it on my headlights till today....its an 06 canyon and they were pretty severely hazed. I really wish i took pics but oh well...one of my upper lights (a DRL) had a fingernail scratch in the coating (from me) but as i mentioned the headlights also were in pretty bad shape. The kit supplied sanding block would work good on a not so badly hazed light but after trying it first (after initially cleaning the lights with window cleaner) i used some 1000 grit and wet sanded all the lights. I even got out the fingernail mark on the DRL then i used the supplied sanding block. When they were dry they looked horrible but like the instructions say...they will look finished like when they were wet with water....its true. While i was sanding them i kept rinsing them off and looking at them to see how clear they looked when wet. When i was satisfied i gave a final rinse and set them aside to dry. As of this writing, i just got done putting on the clear coating and letting them dry before reinstalling them (i took the lights out it was easy and better to sand them then leaning over and worrying about hitting the paint on the fender but it still probably could have been done on the vehicle) After applying the clear coat.... to tell you the truth...I didn't think they would look this good. They look just about brand new. I was initially thinking of replacing them with aftermarket lights but after reading too many complaints of them leaking water i decided to try and refinish the factory GM ones and i'm not disappointed. The only suggestion i can give, is you need to put some extra elbow grease into sanding them....nothing is for free including your labor so don't skimp on sanding them. You'll thank yourself later..... but make sure you keep them wet! Not including the 30 min taking them out and putting the headlights back in it took me about 40 min of sanding, 1hr of drying then a few min of wiping the clear coat on. Gonna wait a couple hrs before reinstalling the lights. Right now their in my garage out of the direct sunlight drying. It says their dry to the touch in 1 hr and to keep them out of moisture for 24 hrs but since i live in the south we usually get a decent dew so i'll prob put a blanket over them tonight till i get up just for ha ha's. This product for the price i say can't be beat. I'm happy with the results. Time will tell me how good this treatment holds up. If possible i'll update this in 6 mos.
Renee Garcia
This thing really does work.
Seriously Amazing!! I was skeptical at it really working, but WOW does it work. Be ready to spend a hour or so. Here is what I did for almost new lights: 1) wash car 2) use the green pad and water bottle to scrub and scrub until all of the cr-p comes off your lights. Spray water and scrub. This takes a while, so be patient its worth it. 3) then apply more water and use the grey pad to scrub and buff some more while spraying more water as you go. 4)let it dry to a haze (relax it will be awesome) 5) now use the buffing cloth. 6) new use the wet pad and watch your labor pay off ! My lights look NEW on my 2008 Porsche cayenne. I had them done professionally 3 years ago and they look better than when I had them done for $100. I'm really curious to see how long it lasts. overall a great product, but be prepared to spend the time and work.