


- Suitable for regular Wood and concrete ceilings
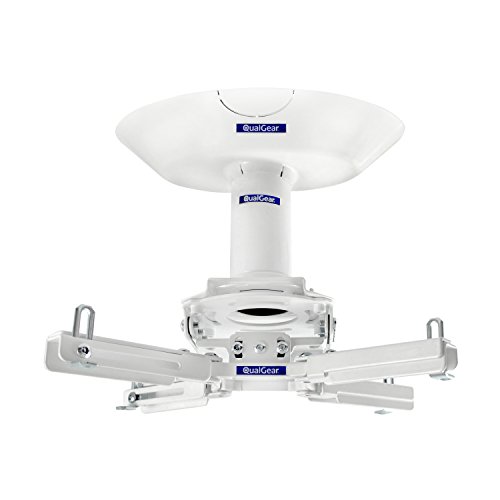
- 1.5" npt thread Compatible
- Color installation manual
- Professional quality
- 5 year limited warranty
-
Information
-
Twitter
-
Pinterest
-
Youtube
-
Facebook
Ryan Jay
Well Built Ceiling Mount
I ordered this mount to hang a projector from our suspended ceiling in our conference room where we have 2x4 ceiling tiles. The mount actually takes the place of 1/2 of one of our tiles; it does not mount above/below an existing tile, as one of the reviews implies. I used a 2' crossmember from Home Depot to split the 2x4 opening in half, and cut the existing tile in half. Everything fit nicely. The mount is very well constructed, and everything needed to install it is included, including hardware to support the mount from structure above the ceiling tile grid. Security screws were a nice bonus to minimize tampering by others. The two knockouts were perfect for adding a receptacle as well as a keystone plate for video, data, and 12V trigger for the projector. The half of the 2x2 mount that doesn't have the projector post below it provided a perfect tray above the ceiling to mount several video-over-cat5 receivers, hidden from view, to drive the projector. The dimensions on the actual mount are a bit deceiving. It can handle a much larger projector than is otherwise implied. Each arm can extend to ~7 inches. One of the dimensional drawings showed the max distance between screws on the projector being around 8 inches, which is not the case; it's much larger. The mount easily fit my larger projector and holds it securely. Overall, the resulting installation looks very professional and well done thanks to a quality mount design.
Chompink Sunshine
Great quality, excellent load capacity.
Ceiling mounted a Sony 1100 projector weighing 44+ pounds. Yes, as with any heavy projector, you must be certain your ceiling will support the weight and as I had to do, add reinforcement to be certain. No big deal, just something you need to be aware of. This mount has a 70 pound capacity so it gave me great headroom for the projector. Adjustments are a little of a pain as you will need to loosen three Allen head screws on each side (6 total) for both X and Y axis adjustments. This is a little cumbersome but once accomplished, it is rock solid. Again, not a deal breaker as it just requires a little patience. The quick release feature is robust but you do have to be cautious when attaching the projector as one slip could be bad. I man handled the 44 pound projector by myself but would highly recommend using at least one other person for heavy projectors so they can stabilize the projector while you tighten the screws. I have added a safety cable for my own peace of mind but it is not necessary. Fit and finish is great. All components (screws, washers, Allen wrenches) are bagged separately and very well organized. Assembly is simple and straight forward. The Sony 1100 has only three mounting holes and although this mount would work as is after removing one mount arm, I wanted the pipe to be better centered on the projector and closer to the rear hole so I fabricated an accessory out of one inch aluminum angle that spanned two of the mount holes after removal of the two arms impacted. That left two arms to attach to the most forward two mount holes and resulted in better centering the main pipe much closer to the projectors center of gravity. I would highly recommend this mount if the weight of your projector warrants it. Fit and finish is excellent.
Neb Saitiam
Well designed and heavily built!
At first, I wasn't sure I ordered the right thing because it came in several boxes. Once I unpacked it, there were a lot of hardware and pieces. I am not very handy, so it took me a bit to figure out things - Good thing that the instructions were well written and clear. I was installing a projector on a drop ceiling, so I chose the Drop Ceiling one. I've attached an image. I love the idea of being able to slide the projector rearward or forward as needed. All the parts are well built and heavy. I imagine it will support a much heavier object than a projector. I am so happy with this Mount, compared to paying twice as much for a Dell version.
Delores Brunson
Very nice truss mount for projectors!
I received the QualGear truss mounting kit and my first impressions were that it is very well constructed and sturdy. It is made to mount to any truss and fits most projectors on the market. Since my projectors are mounted over people, I want to make sure that the projectors are secure and there isn't any chance they will come crashing down on someone. At first I thought the price was a little high, but after researching other truss mounts, I found that this one is actually priced lower. I highly suggest this mount if you are using a truss.
Wint Sandar
Worked great on a larger projector.
I upgraded from an Optima 720p projector to an Epson 5040ub home cinema. The larger projector required a larger support span and this worked great. I didn’t use the ceiling mount plate or extension tube as this easily fit the existing mounting pipe I had installed. However the ceiling plate looks very sturdy and I may install eventually as I like the snap over cover and the ability to feed wiring down through the tube that I don’t have now. I would give this 4.5 stars as I preferred the knurled knobs on my old mount for adjusting the angles, but the allen head screws on this system worked perfectly fine. Another bonus is it came with a variety of mounting bolts to allow for different size projectors. A nice touch. I would definately recommend this unit.
Aroha Samuels
The mounting plate was a nice snug fit in a 2x4 grid
Installed this for a customer's regional HQ conference room. I did a full electrical TI including the low volt scope which was installing an enterprise WIFI network, setting up the presentation equipment on a wireless network, and relocating the projector and sound equipment to the conference room ceiling. The previous contractor was not very competent, my company was asked to repair their substandard work. The mounting plate was a nice snug fit in a 2x4 grid. I was able to locate it next to an HVAC register that was also 2x2. The supplied kit did actually contain every possible projector mounting bolt, both SAE and metric, every different anchor for diverse mounting options, as well as all the hex wrenches required to secure the many different fastener types. I opted to use my own self-tapping ceiling wire anchors as the deck was over 10' above the suspended ceiling, so a pole gun was required. The mounting kit included a 1 1/2" x 3" electroplated nipple to match the two mounting plate pieces. The projector had three mounting points and the kit has a four projector mounting arms. I read other reviews that complained about this. All you do is remove one of the arms, completely loosen the adjustment screws on the remaining three arms, and you can easily find a good mounting pattern that will also allow for angle, pitch and yaw adjustment, when fine tuning the projector after the initial mount. It makes sense they included four arms for the projector models that utilize four points of contact. I was easily able to fish all power and data through the nipple, but the mounting plate had two knock outs available in case single gang boxes was preferred. This was easily one of the most complete kits I have ever purchased. The bolts supplied were even stainless steel. The finished product was aesthetically symmetrical and helped to deliver very professional project. Due to the previous contractors issues I had to totally rewire the entire electrical system, then upgrade the data and comms, the emphasis was on quality, with focus on exceptional craftsmanship. While utility in nature, the finish on the mounting elements will naturally blend right in with the surroundings. I will definitely use this vendor for any future needs.
Vanessa Gomez
Solid and flexible mount, works on BenQ
I needed a mount with a specific drop down in length and this was next to the only thing available with a swappable pipe length system that looked reliable. The next thing I was going to get if this didn't work was a Peerless mount, which was going to cost well into the $150+ range after needing all the bells and whistles. Glad I decided to try this mount out. I was worried that this would not fit my BenQ HT2050a but decided to look at the measurements and it seemed like this could fit pretty much close to anything with a little tinkering. Well I'm happy to report that this does in fact fit the BenQ HT2050 / HT2050a. See my first image attached on how I was able to connect all three mounting points. I was able to point the mount in the direction of the screen too (there's arrows that point to the direction it should face). I only needed three arms, so I took off the fourth too. The arm that is sticking out in front does not interfere with the image on the screen as well. The current measurements that I got with the default 3 inch included pipe (which actually measures to something like 4.75 inches with the threads) from the ceiling to center of the lens was 10.5 inches. I needed it to sit around 11.5" - 12". Luckily this mount is compatible with the standard 1.5" NPT threaded pipes in the plumbing aisle of home depot. So I ended up buying a 6" NPT 1.5" threaded pipe for I think like $6/$7. With this swapped pipe out, now it will sit for me at 11.75" -- perfect. Another thing that I was worried about was not having the pipe lined up with one of my joists since they run longways in the room and not side to side. In the directions they have you use the center holes only for mounting to a wood joist and the other four for cement installation. I needed to have it offset from the joist so I used one of the corner holes in a wood joist and the opposite corner hole with a toggle bolt that holds up to 95 lbs. Seems pretty sturdy to me. That one screw in the joist should be enough to hold it to be honest. It took me a couple of hours after work to measure, prep, figure out the mounting situation on the projector, run to home depot, measure five more times, and then decide on a spot making sure I was going into a joist, and finally installing it. Lot of pressure trying to decide where you want it to sit. If I need to move it down the road I'll probably install a painted piece of plywood mounted to the joists for flexibility sake. So happy it's up now and ready to continue working on the room / screen. For what you get I would definitely rate it five stars. Simple and straightforward and useful for rotation and flexibility of length with the 1.5" NPT threads. My situation, experience, mounting and length requirements is certainly irrelevant of the product.
Kerrie Hogben
Very impressive mounts!
We ordered two of these mounts for a friend's club projectors and were pleasantly surprised by the build quality given their price point. I have used and handled many different projector mounts and found this one easy to use and built like a tank. Installation was simple for the base plate despite being on a vaulted ceiling, as was the mount to the projector. In this case, we were using BenQ HT1070A projectors and can attest that this mount works very well with these devices. The only thing wanting in this kit is a pipe for the correct drop length needed for your installation. You can order one of QualGear's drop pipes and connectors to fit your needs or, if you don't want to risk having the wrong answer on it, do as we did. We went to Home Depot and bought a coupling and every size from 3" to 18" so we could see what worked before for this installation since we had to maneuver around other stuff on the ceiling and couldn't get what we felt was an exact measure. We then just returned the unused pieces after we had it where we wanted it. Minor adjustments were easy and the entire project was done pretty quickly.
Johnny Banks
Fit large projector, Solid build, Very adjustable, wont move after install
I was having a hard time finding a mount that would work with the Epson 5030UB as its mounting screws are very far apart but this mount was so versatile I had no problem adjusting the arms to fit the large projector. I especially like the Mounting Bracket cover which hides the bracket attached to our wood beam ceiling. The tube was just large enough to run and conceal the power cable and the HDMI cable. The Adjustment options were also nice including tilt forward and back and side to side. I purchased the optional pipes to make the drop from the ceiling almost 14 inches. The appropriate height for the height of my screen location. It comes with logo stickers on the pipe and the bracket cover but I was able to easily remove these branding stickers, making the unit look clean and modern. Its solid and comes with additional small screws to lock in the drop pipe so it doesnt turn left or right. Mounting the projector bracket to the pole was easy based on the design. I was able to lock all the screws down and everything is snug, I dont have to worry about the projector moving in the future and this is important as I spent a bit of time aligning the projector image perfectly to the edges of my 127" screen. It was a bit pricey compared to the other options, but I'll gladly pay a bit more for functionality, compatibility, stability and build quality. This met all my expectations.
Carolyn Gillish
It's great look and ability slide side to side in the ceiling frame is it's super power.
This projector ceiling mouth system completely met my needs. It allowed me to ceiling mount the 1080p Naitive CiBest projector in away that was very sturdy. The multiple adjustable parts make it possible to get an acceptable picture focus on the screen while keeping your sanity. The CiBest projector does not have the zoom ability, so get picture focus and screen picture fit has to be done largely by placing the projector in just the right spot. Just remove the drop ceiling tile and follow the instructions. Being able to slide the projector closer or farther from the screen and move side to side within the ceiling tile frame is what this mount does that most others I looked at did not. This feature let's you hang the projector mount as a hole and slide it to best picture placement without having to simultaneously suspend the projector mammualy (my projector weighs arround 5 pounds). I completed this install easily without needing anyone to help hold or lift the mouth or projector. This mounts color and design also give it a better appearance than any other mounts with it's capabilities based on an extremely long search for mounts. This mounts ability to pivot in various directions and slide in both directions while suspend within the typical 2'x2' cieling tile frame is it's super power. Once you have achieved the best picture adjustments you can simply tighten down all parts and place the ceiling tile either in background on top of mount on either side. Looks great!