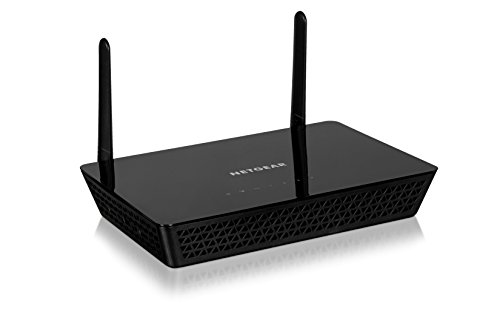
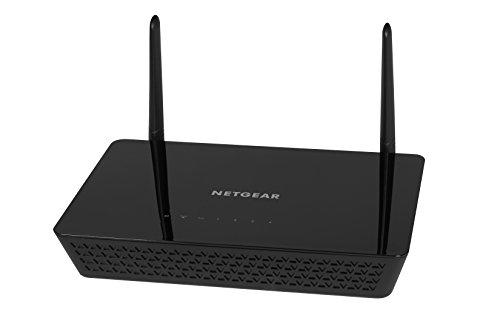
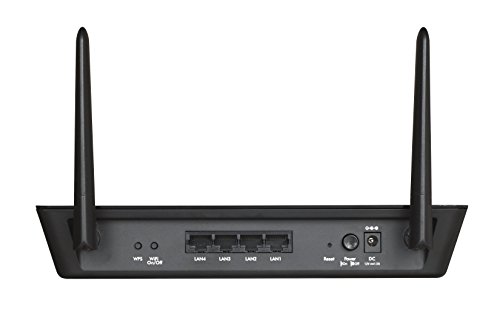
- Fast dual band 802.11ac WiFi at a combined aggregate speed of 1.2 Gbps (300Mbps at 2.4 GHz and 867Mbps at 5 GHz)
- Factory tuned external antennas provide superior signal and far reaching WiFi coverage
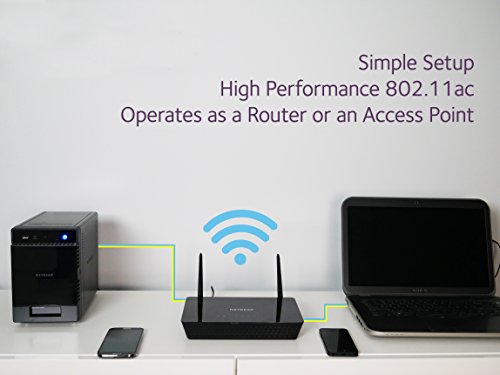
- Advanced Security & Flexible Wireless Configuration - access point, and WDS point-to-point / point-to-multipoint wireless bridge mode
- Works with all N150, N300, N600 and AC devices. IPV6 support for improved performance
- Easy to setup and configure with WiFi Protected System (WPS) button for easy one-touch client connectivity
- Four (4) built-in Gigabit Ethernet ports to connect to PC, laptops, and other wired devices
-
Information
-
Twitter
-
Pinterest
-
Youtube
-
Facebook
Muhammad Naseer
Works fine
I replaced an Apple Extreme that started having problems with this and several problems went away. I replaced and AP with a netgear AP at sametime and my problem with transitioning when moving from one end of the ouse with mobiles went away. Don't care for the mobile app much, so I use the browser interface. It works fine and is way faster than the old apple even on 2.4g. I would buy again if needed.
Linda Swiger
Very happy with this product
Very happy with this product. But to set it up, you need some understanding of how IP addresses work. This access point's IP is 192.168.2.xxx. Most routers and home computers are in the 192.168.1.xxx range. So, to access this product with your computer, you've got to get your machine in the same IP range. Once you set it up, you can change it's IP to the 292.168.1.xxx range, and all will be fine. So far, very strong WiFi radio with solid connection. Deal!
Jerrie Pat Gale
Good solution at a decent price
We moved to a new house and the router is at the opposite corner from the farthest room in the house, so WiFi signal was weak. Fortunately this is new construction and all the rooms are wired to a central wiring cabinet. By connecting the Cat5e cable for the distant room to the router, we now have a strong signal on that side of the house, plus three additional hard-wired port.
Rod Mackay
Must do setup using "direct connect" method
Once you get it set up, it works fantastic. Strong wireless signal on both 2.4 and 5 bands. Super-fast wireless from my 900MB home broadband. Excellent access point. The only thing is, as others have said, is that the instructions for how to "just plug it in to a port on the router, and DHCP will take over, and then set it up" are unproductive. The default setup in the AP is for DHCP, but for the wrong network due to its default IP address of 192,.168.0.100. My router is 192.168.1.1, and the AP doesn't get set up properly by DHCP. I tried to follow these instructions first, and as others have said it just doesn't succeed, for the obvious reasons. But I've had prior experience with an earlier version of the Netgear access points, model WN604. The setup approach in that older model was outright described for manual method, temporarily connecting directly to a laptop or PC via ethernet cable. These are exactly the same manual configuration instructions as are described in the user manual for this new WAC104. Once you take this manual approach, instead of the DHCP approach, it's just a few minutes to complete the setup and get the WAC104 prepared for actually being connected on my 192.168.1.1 network. You first need to get your laptop or PC into the TCP/IPv4 properties, in order to change from "DHCP" to "manual static IP" mode. This is from Network and Sharing Center, and then click on "Change adapter settings", and then select your ethernet connection object, and right-click and select Properties to get the Properties dialog window. Then select the "Internet Protocol Version 4 (TCP/IPv4)" item, and push the PROPERTIES button. You're probably in "obtain an IP address automatically" mode, which means your PC/laptop is normally handled by DHCP from your router. Temporarily you must instead change this to "Use the following IP address", to assign a static IP (as described in the manual setup instructions of the WAC104 user guide) that will make the WAC104 directly visible to your PC/laptop. Enter an IP address of say 192.168.0.201, and a subnet mask of 255.255.255.0, and you can leave the "default gateway" blank. Then push OK, and OK your way all the way back out, and shut down. Then disconnect the ethernet cable from your PC/laptop to your LAN, and instead connect it from the PC/laptop directly to one port of the WAC104. Now re-boot the PC/laptop, and ignore any startup errors you might get from any of your software that might complain about not being able to get to the internet. On the computer, open a web browser and enter 192.168.0.100 in the address bar. A login window opens. Enter the access point user name and password. The default user name is admin. The default password is password. The user name and password are case-sensitive. You can change these default values later as part of your setup, if you want. The Home page displays. Customize the access point settings for your network environment. My approach was to configure the WAC104 for "static IP" (not DHCP), exactly as I did with my previous WN604. I picked a known available and currently unused IP address of 192.168.1.124, with a subnet mask of 255.255.255.0, and a default gateway of 192.168.1.1, and a primary DNS server of 192.168.1.1. This means in normal operation your WAC104 will always have a static IP address of 192.168.1.124 from your router at 192.168.1.1. And that means you can always subsequently get back into the setup dialog of the WAC104 if you want to, by using a browser and addressing it via 192.168.1.124. I also set my desired new SSID network names for the 2.4 and 5 networks, along with the new passwords (i.e. "passphrase") for those WiFi network signins. I also set wireless security to "WPA2-PSK [AES]", for maximum wireless speed on both 2.4/5 bands. At first I checked "WPA-PSK [TKIP] + WPA2-PSK [AES]" but when I pushed APPLY I was warned about the full-speed limitation of this option, something I wasn't aware of. So I instead checked the "WPA2-PSK [AES]" option which is perfectly fine with me. If you want you can also change the WAC104 login username and password through the Administration -> Set password dialog. Push the APPLY button, to save all customized settings. After you complete the setup go back into Network and Sharing Center, etc., and change the PC/laptop TCPIPv4 properties back to original IP address or DHCP. Then shut down the computer and power-off the WAC104, and disconnect everything. Now you can reconnect the PC/laptop with ethernet cable back to your router, and reboot. Everything should be back to normal again. And you can connect the WAC104 through its own ethernet cable run to an open port on your router (or remote switch). Power-on the WAC104, and wait for the lights to stabilize. You should now be able to confirm that you see the two new 2.4/5 WiFi networks using your smart phone and a WiFi Analyzer app. You should also confirm from your PC/laptop that you can also get to 192.168.1.124 via a browser. Simple and straightforward. Just manually connect static-IP PC/laptop via ethernet cable directly to the WAC104 for setup.
Carmelita Russiana-Catubig Lisondra
Works well
I bought this access point to work with my ISP supplied DSLmodem/router combo. I had problems with the old router constantly dropping out of the wifi network. I suspected there were too many devices connected. With the new device, it has worked without network loss for a week now. Setup was easy and took a few minutes. The signal strength was about the same as the old router, but wifi seems faster.
Ana Kolevska
Easy Configuration, Great Range
I purchased this product when my router which acted as my wifi access point developed an issue with it's wifi. Rather than replacing my router which still worked fine as a router, I decided to use this network access point which I connected to a network line elsewhere in my house. My router was in my basement so, sometimes the signal could be weak in my second story already. I have been using this for several months now. It has worked splendidly. I was able to get it installed an configured in less than an hour. I now have a much more reliable signal throughout my house. It is also, able to reach farther into my yard whereby, I can better use my wifi anywhere outside. Please, remember to secure your connections.
Amy Jenkins
Great Way to Extend your Wireless Network
I ad a significant degradation issue between the location where I work and the location of my primary router. I bought this to improve the situation, and it delivered beyond my expectations. Prior to adding this device, I was getting 30-50 mbs on my laptop. After adding it, I was back to my ISP limit of >200mbs! I did not give the installation 5 stars, since the directions are simply wrong. You need a little networking knowledge to install this device to avoid the issues caused by following the directions. For those not so well versed, simply do NOT hook AC1200 to an Ethernet port. If you skip this step in the directions, the rest should work. If you have attached the device to an Ethernet port, then you will need to get the IP address from your DHCP server, so you can access the admin tools on the AC1200. If this last sentence confuses you, stick with the first part of this paragraph. Overall, I am very pleased and recommend this extender. It's affordable and does the job!
Rebecca Carothers
It does what it is supposed to—extends my single home network.
So after reading complaints about installing this, I bought it anyway and it does what it is supposed to do. It extended my wireless range to the other end of my long, but narrow house. Previously, I had two different but identical routers installed, that were tied together by an Ethernet cable I installed while rebuilding my kitchen. But that meant that there were two different wireless networks, and sometimes, when a device could still barely see the far network, it would still hang on (weakly) and not connect to the closer, stronger network. Now it is one network throughout the house, and any device signed into that network seamlessly moves from hot spot to hot spot without a hitch. I'm not at all an IT pro, but I have a basic working knowledge of networks—and this install went very smoothly. P.S. All home devices and my set-up computer were Macs.
TodoLakas Udani
Easy to use, works well!
We used this to extend an office wireless network and it was easy to implement and works very well. I would recommend it to others and use it again if needed. We attached this to an existing RJ45 connection and we use the extra ports coming off of it for the original device. If we need to extend the wireless range again perhaps we'll be able to do the same thing with another unit. Lots of value for the money. Our original plan was to use POE connections to this type of device TP-Link EAP225 V3 Wireless MU-MIMO Gigabit Ceiling Mount Access Point, Supports 802.3af PoE and Passive PoE(Injector Included), AC1350. The result of trying the quick fix of this NETGEAR is we do not need to improve it now. Works great!
Dean Stone
Great product!
This unit was absolutely easy to set up. I do have a Netgear Nighthawk router, so that may have been one of the reasons. You do need to have an Ethernet cable connected to your existing router in order to set it up. I have a switch and a long Ethernet cable attached to it running under my home to my living room. The router is located at the back of the house (I didn't want it visible to others as it is ugly) causing connection issues with the various wireless devices we have. The existing Ethernet cable is attached to a switch, then to my television and I use another port to attach another Ethernet cable and ran it around the room and placed the unit on top of a bookcase. It is out of sight, yet high as the AP should be. I now have excellent wireless connection to all devices, and even a strong signal out in my front porch, which is what I was looking for. Of course your internet connection speed will vary with your internet provider and the plan that you have signed up for. I reach download speeds that I used to have to be wired to the router now on all my wireless devices. As other reviewers have noted, it does need to have the security function set up (through the app) in order to keep your neighbors from getting free wi-fi from your home. It's a relatively simple thing to do. Open up the app by typing in the IP address (it's on the bottom of the unit, unless you gave it a different IP), go to security and input password protection. You also have the option to rename the default wireless name.