

- 🎈100% Brand New and high quality
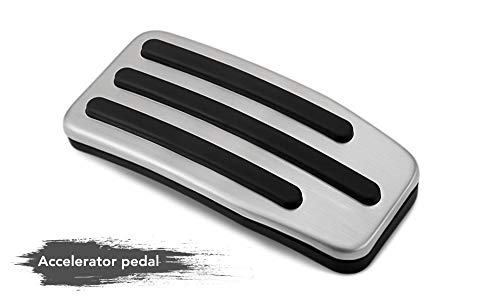
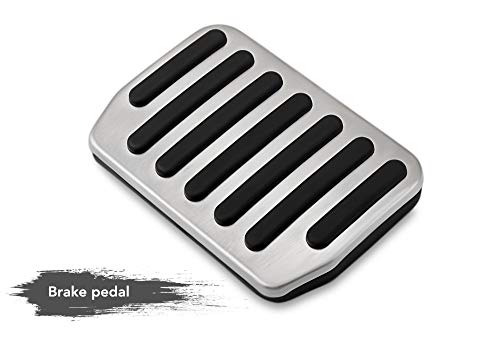
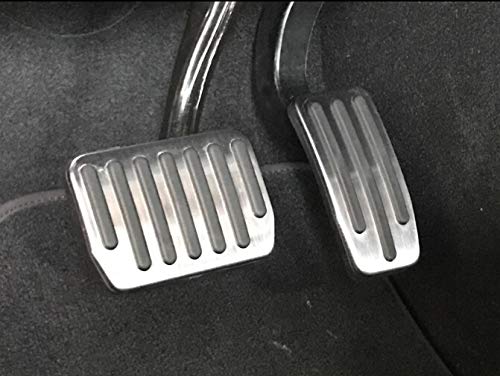
- 🎈Fashion Style Customized Fit forTesla Model 3
- 🎈Ideal for auto DIY, a perfect replacement
- 🎈Non Slip surface design, safety for driving and strengthen the friction coefficient
- 🎈Easy installation,Please Check You Car Style Carefully before Buying
-
Information
-
Twitter
-
Pinterest
-
Youtube
-
Facebook
Rebeca Shreve
They fit and look great.
These pedals are easy to swap out but do require some effort to install. They are also priced a lot better than other sellers online.
Achref Khairi
Perfect fit
Perfect tight fit so it took a bit of time to install.
Rob Sinclair
Ease of installation and price
Wow! I was a little worried about all the posts regarding the difficulties of installing these pedal covers. It took me 2 minutes total to secure the fit, without the need for hot water to soften the rubber. There is no smell. Watch this YouTube video: https://youtu.be/UdnPLKTNDTs It's a 10 minute video (inclusive of a foot rest cover which I did not purchase) and took me far less time than it took the guy in the video. Lastly, don't waste your money on the more expensive pedal covers. These $12 buck ones are sturdy, durable and look awesome on my Model 3.
Melissa Lynn Gilliland
Worth the Effort
As others have commented, it can be a little difficult to install the new pedals, especially since the working space is so tight, at least for me. The brake pedal wasn’t too diffcult, but the accelerator pedal was a bit tougher. Running hot water over it made it more pliable, and easier to install. Total time was about ten minutes for both. And they look great!
Bhes Raj Baral
This is a no brainer mod.
They look great, cost 10 bucks, and easy to install- took all of 3 minutes. Accelerator slips on from the bottom of the pedal, brake a tad more difficult slips on from the top. Use your fingers and run down the sides pulling the rubber of the new pedals outward to cover the existing brake and accelerator snugly.
Jacob Smith
These pedals look great! Good value, too.
Thought I’d take a chance on these Model 3 pedals because they looked good in the pictures and are less expensive than similar ones sold on Amazon. Like other similar pedals, the accelerator pedal fits over the existing pedal, and the brake pedal replaces the original rubber brake pedal which must first be pried off. No special tools are required, just strong hands and fingers. Be sure to soak these pedals for 10 minutes in hot water in order to soften the rubber backing before you attempt to mount them. It took me about 8 minutes per pedal to install them AFTER I realized the rubber needed to be softened with hot water. A small mirror and a flashlight are helpful to inspect the back side of each pedal to insure the rubber backing is completely wrapped around the object to which it is mounted. The fit is excellent; it is very tight and solid! It appears that these pedals are fabricated from stamped sheet aluminum, pressed over mounded rubber. I think you will agree that these pedals definitely enhance the beauty of this fine vehicle.
Romel Cinco
Great Price, Great Fit and Looks More Expensive than a $16 Upgrade
Love these pedals. So many of the ones I see online that are inexpensive look like plastic painted silver (and a lot of them are plastic). These are NOT plastic but look like they are made out of aluminum They do come new in a sealed bag. I like that the accelerator pedal only has 3 lines on it. Some of the other after market ones make them with 5 or more lines of rubber (if you're going to make a copy of the factory pedals, at least make them look like the factory Tesla pedals...only visible difference is that the REAL OEM accelerator pedal that comes in the Model 3P have the 3 lines that are all the same length, not 2 short and one long...not a big deal for the price). The factory pedals that Tesla sells for the model S and X (which do not fit the model 3) are $150/set including them installing them for you and they ship to the Tesla service center ONLY. Not a difficult install even though they are a super tight fit for safety. I just followed advice of others and soaked the brake pedal in hot water for about 5 minutes. Can highly recommend these. The price was great at $16 too.
Antonio Villaalta
Love it! Don't get why people are paying twice as much for similar options.
Hard to put on (which is great, because you know it'll stay put!). Didn't need to soak these in hot water as suggested, and took about 5ish minutes and some struggle. They look great, and I prefer these to the 5 line gas pedal look of the more popular and expensive option on Amazon.
Mutcasa Montealegre Resh
Not too hard to install
They look amazing. I am really happy because I was thinking about getting the more expensive ones... glad I went with these. Installation was not difficult. I got them on with a little bit of elbow grease. The accelerator pedal slides on very easily, from the bottom upward. The brake pedal you need to slide off the original and then slide the new one on from top to bottom. Once it’s on you have to get the bottom lip out, just hold the side rubber with your fingers and firmly work out the bottom rubber. Takes 1-2 minutes but you need to have strong-ish fingers. Probably much easier if you sifters the rubber with heat like the other comments said. Once in place, they fit perfectly and look great.
Marsha Felton
They look great but not easy to install.
These peddles look great. Tesla dropped the ball with the stock peddles. Some reviews say to soak them in hot water to soften the rubber. I soaked them and still couldn't get the break peddle on. I parked my car in direct sunlight on a warm day with the break pad on the dashboard. I waited until the Tesla app told me the temperature in the car was 100 degrees F. The peddle went on relatively easy with the pliable rubber. Just another idea to try.